My eyes immediately notice crooked lines when viewing photographs.
I don’t know if I’m alone here, but photos with non-horizontal horizons or square corners that don’t line up perpendicularly set off my OCD triggers. Perhaps this is one of those subtle, yet unavoidable differences between professional photos and amateur ones that makes an impactful statement about professionalism or amateurism.
Straightening photos in Lightroom is simple and will instantly give your photos an attractive finish.
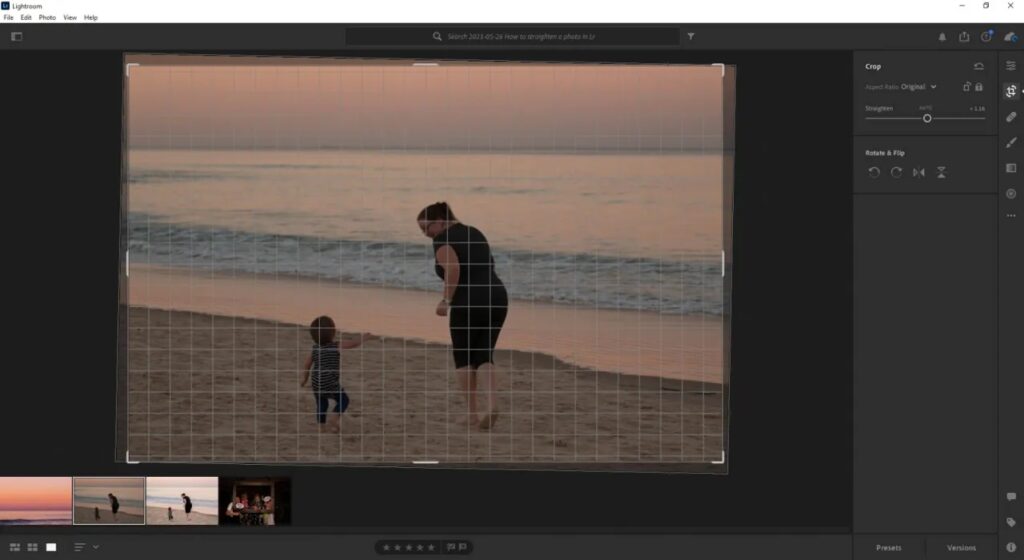
Straighten Your Horizon in Lightroom Lightroom’s crop tool may be all it takes to address photos with wonky horizons. Simply hit the crop icon, drag outside of the photo to rotate it and use its guidelines for alignment if necessary.

By pressing “Auto” at the center of the “Straighten” slider, Lightroom will use its AI judgement to find an angle to straighten out your horizon.
If you have taken multiple photos on a similar angle (for instance using a tripod while shooting landscape shots), copy and paste your crop settings onto other photos in your Lightroom catalog by making sure Crop is selected under Tools; by default, crop settling won’t be copied over.
Advanced Straightening With Lightroom’s Geometry Tool
I was truly stunned when I learned about Lightroom’s geometry tool; it literally changed my life! Before, I would only attempt to straighten with the crop tool, often leading to frustration when my pictures didn’t turn out perpendicularly. If you have ever shot perpendicular lines (think doorway, picture frame or house side) from outside their centerpoint and were frustrated that you can’t fix them with crop tool, this tip may help!
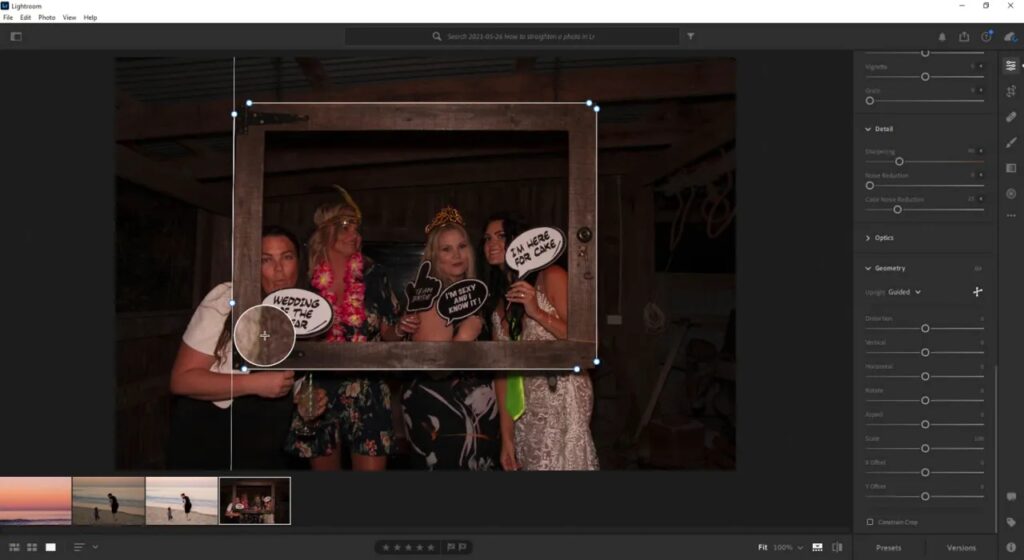
Geometry allows you to specify where horizontal and vertical planes should exist in your photo. On desktop computers, this tool can be found at the bottom of the main edit panel while mobile users will find it at the bottom ribbon next to Presets (for paid versions only).

To use, click and drag across one of the horizontal planes of your photo using the icon that looks like two crossed lines, repeat for other horizontal planes and vertical planes to mark them – up to four guidelines can be placed and you should see your photo being tugged into its proper place with each guideline placed.
Use the Distortion slider to correct for any fisheye effects from your lens. When everything has been squared away, use the regular crop tool for final adjustments and edit as usual.

Straighten Up and Ship Out
Symmetry and straight lines are pleasing to the eye. By applying just a few clicks of editing software to your photos, you can give them an appealing professional finish that takes even hastily snapped phone pics to new levels of excellence.
